I Took 35mm Film Photos With an Anamorphic Lens: Was It Worth It?
Last year, I got back into taking photos on film mostly as a way to remember my father. It sparked a joy in photography I hadn’t experienced in many years and as a result, I started to get more interested in different formats. Panoramic photography, in particular, very much interested me.
Unfortunately, I didn’t feel like my already expensive hobby could continue if I were to purchase a panoramic camera. They’re uncommon, pricey, and often quite large and even when they’re smaller, they’re much harder to find and even more expensive. I wanted to forget about it, but I couldn’t shake the desire to create these gorgeous panoramic photos, especially when I saw what my friend David Imel was making.

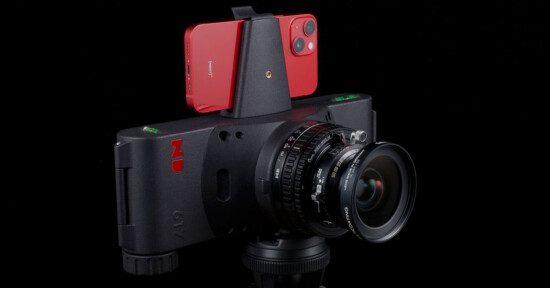
When I realized my desire for panoramic photos wasn’t going to subside, I decided to look into other options. That’s when I thought about anamorphic lenses, which might not be true panoramics but would provide me with the same aesthetic. Over the last few years, anamorphic lenses have gotten cheaper and more easily accessible, so I thought it might be fun to try and mount one to my dad’s Nikon F.

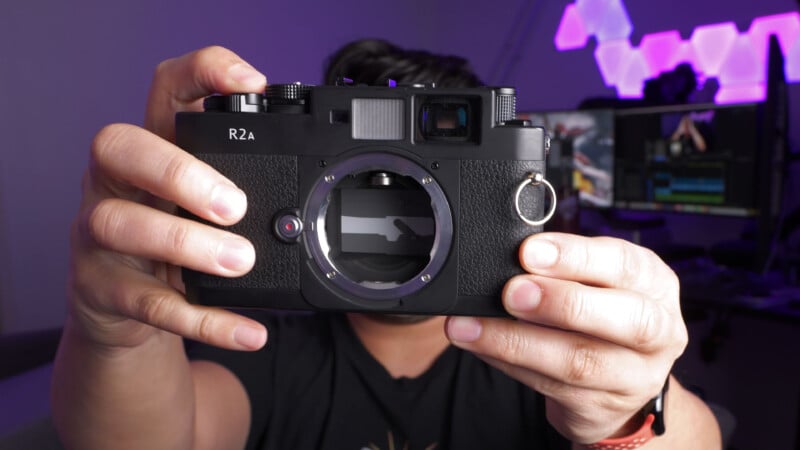
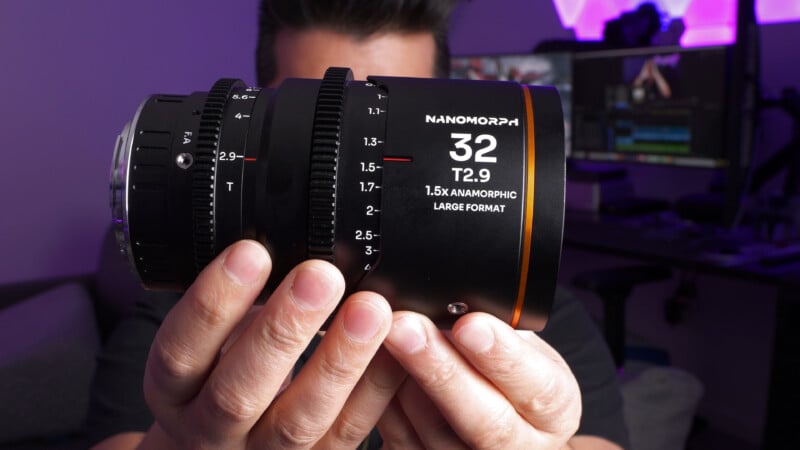
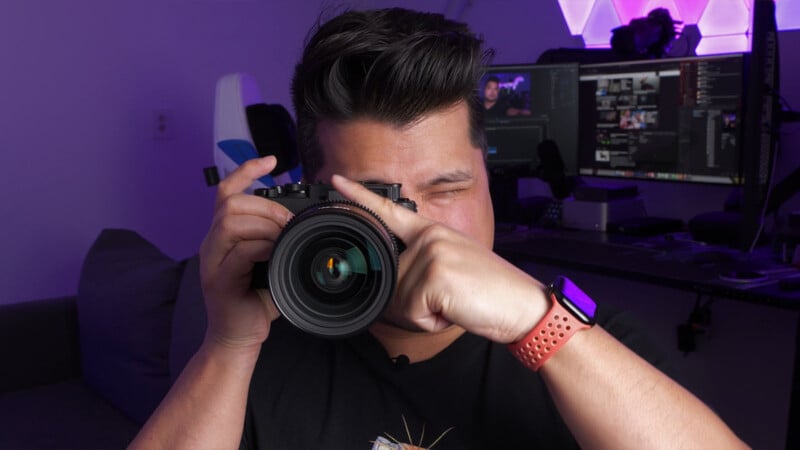
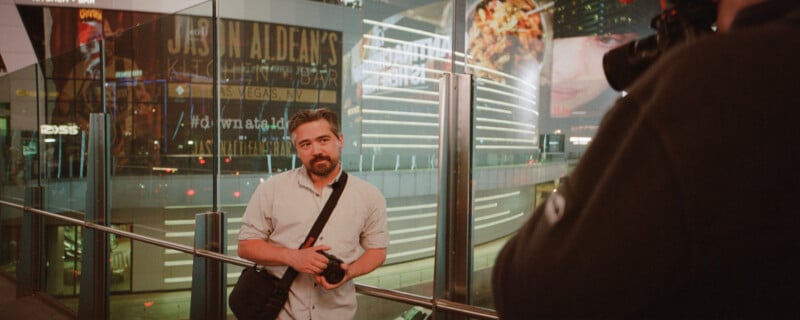
Unfortunately, I learned pretty quickly that there is no adapter for any film SLR to a modern digital optic due to flange back distance: they just don’t work that way. Luckily, Chris Niccolls convinced me to pick up a Bessa R2a last year and that takes Leica M-mount, a mount that is not only still being actively developed but also is easily adapted. So I picked up a Laowa Nanomorph 32mm f/2.9, an EF to M adapter, and got to work.
I should probably mention that I’m not saving all that much money on getting an anamorphic lens upfront. It’s more of a savings based on film and development costs. The Laowa Nanomorph 32mm T2.9 still costs $1,500. But unlike a panoramic camera, I can shoot all 36 shots on a roll of standard film and each one will be ultra-wide. It’s also 35mm and not 120, which is further savings on a per-photo basis. But all that said, this is still an expensive experiment.
A Refresher: What Is Anamorphic?
Last December, while I was actively working on this project, we published an article from Taylor Scott Mason who had a similar idea to me: shooting anamorphic still photos. He used an Atlas lens, which costs a lot, but got some fabulous photos. While he explains what anamorphic is briefly, I thought it might be worth it to explain it a bit more in-depth.
Anamorphic optics were, supposedly, originally developed during World War I to provide a wider angle of view for military tanks. They were eventually ported over to use for cinema, saw some use starting in the mid-century, and fell off in popularity in the late 1990s. It saw a resurgence in popularity once digital sensors saw dramatic low-light performance improvements and they have since become widespread in both cinema and television applications.
Anamorphic lenses have a wholly different construction compared to standard spherical camera lenses. Moment describes this pretty well:
“When it comes to lenses, there are two main camps: spherical and anamorphic. Spherical lenses are the standard go-to, delivering images that match the sensor’s aspect ratio with no funny business — what you see is what you get. Anamorphic lenses, however, play with the image a bit more creatively, squishing the frame along its longer dimension. This squeeze means you’ll need to stretch things back out in post-production or when projecting, but the payoff is that signature cinematic look,” Moment explains.
“By compressing the image horizontally, anamorphic lenses let you capture those ultra-wide shots even with standard-sized sensors while delivering gorgeous oval bokeh and fewer pesky aberrations than their spherical counterparts. It’s no wonder these lenses are a favorite for creating epic, unforgettable visuals.”
High-end cinema anamorphic lenses will typically feature a squeeze of 2x, but more affordable anamorphic lenses have a less dramatic squeeze of 1.33x or 1.5x. In my case, the Laowa Nanomorph is a 1.5x anamorphic lens.
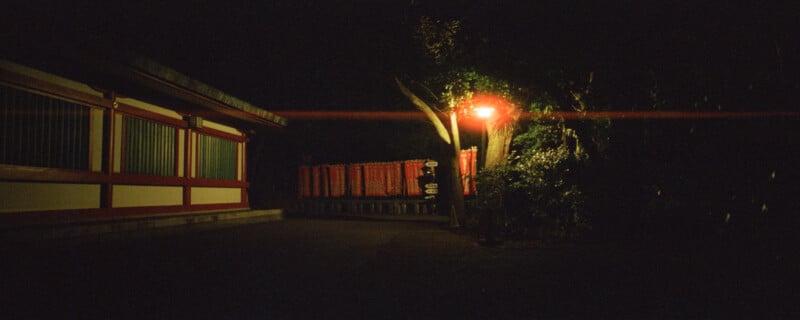
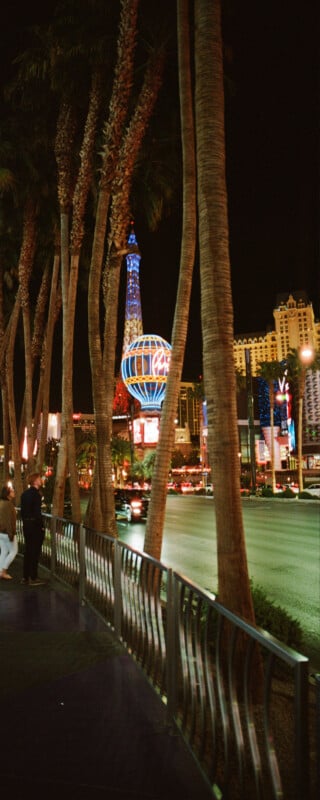
Anamorphic lenses have some pretty well-known characteristics — even the average movie-goer will know them, even if they don’t know they know. For example, the dramatic lens flares in a JJ Abrams or Christopher Nolan movie are due to anamorphic optics. The most iconic is the long horizontal line flare that usually has a blue tint. The Laowa Nanomorph takes this a step further and lets you pick among three flare colors: amber, blue, and silver. Mine is the stock-standard amber.
All we really need to take away from this is the squeeze part: anamorphic lenses will allow a photographer to capture a wider field of view onto a standard 35mm film frame without needing to alter any of the other components of the camera; the lens alone will be enough.
Film Photography Limitations
As I mentioned, there are no film SLRs with a short enough flange back to make adapting modern lenses possible, which means during this test I was using the Voigtlander Bessa R2a rangefinder. Because I was adapting an EF lens to M, there is no rangefinder focus coupling, meaning that I would either have to know how far I was from my subject and manually set my focus to that, or I would have to be happy shooting at infinity.

I chose, for the most part, the latter. I decided that the part about David Imel’s panoramic photos that I liked was his landscapes and those were going to mostly involve photos taken at infinity anyway.
The other problem was figuring out what my frame was. I could use the rangefinder guides — the Bessa has a 35mm one, of course, but not a 32mm one — but they would only provide a general idea of what was in the frame. I would very likely have more in the frame than I realized. I decided I was okay with that, too. I would have to be.
Oh, and color film isn’t very sensitive. That became an issue.
Anamorphic on 35mm Film: How It Shoots
Shooting ultra-wide panels through the winter showed me why this format wasn’t super popular for a long time: shooting on color film with its limited ISOs is very difficult. On bright days, I would need to meter my highlights and then my shadows would get crushed. Shooting in low light means balancing my need for at least 1/60 second shutter speeds against the T2.9 iris, which isn’t particularly bright. Often I would end up with dramatically underexposed photos. When they weren’t underexposed, they were very likely out of focus as I struggled to remember everything I needed to do to get a photo captured with this absurd setup.
I say absurd because while I complained earlier that panoramic cameras tend to be huge and I wasn’t the biggest fan of that, my adapted Nanomorph on the Bessa R2a isn’t exactly small and lightweight either. Quite the opposite. It might not look like a lot, but this whole package weighs 1,640 grams (without a roll of film) which is about 4/5 of a Nikon Noct lens, PetaPixel‘s humorously referred to unit of measurement for “that’s heavy.”
As you can imagine, it’s hard to balance that much weight and get a stable frame with slow shutter speeds. I quickly realized that 1/30 second was pushing it and half my shots would be blurry, so I forced myself to only shoot in scenes where I was able to get to 1/60 second. Since I wanted to get some flare, I often chose to shoot at night which complicated my setup further.

Anamorphic lenses also have smooth focus and iris rings, which means the second I’m done shooting a scene, I’m going to fall out of infinity. I can think of countless times that I forgot to check my focus point and realized I focused too close because my hand slightly moved the focus ring.
The biggest issue by far, however, was not being able to see my composition before taking the shot. As mentioned, I just had rangefinder guides and when looking through the R2a’s finder, about half the frame is taken up by the massive lens. So even with that already handicapped viewing experience, half is unusable. I really did have to use my imagination or look at a scene, pull the camera to my eye, and visualize what parts weren’t visible.
This is a slow, plodding, deliberate shooting experience; and remember, this is coming from a guy who shoots with a Nikon FTn most of the time and that’s not anywhere near what I would call a “fast” camera. Even for an analog photographer, this process is painfully slow.
Anamorphic on 35mm Film: The Results
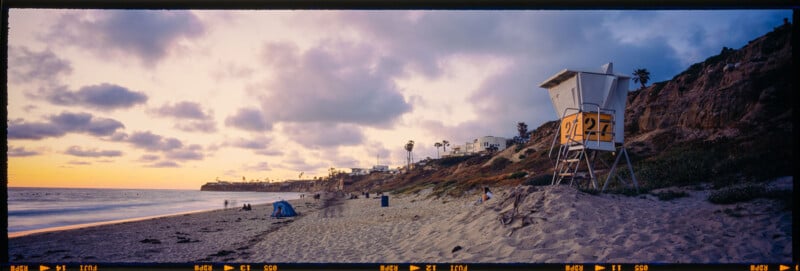
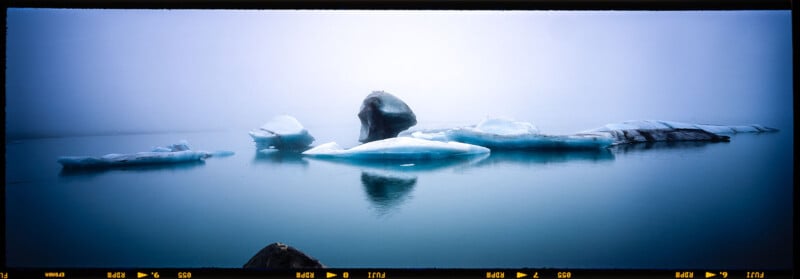
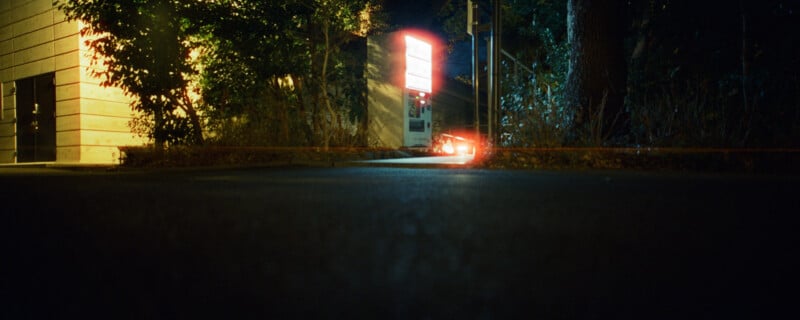
Once the photos are developed and scanned, there is one more step before the photo is finished: the de-squeeze. As mentioned, an anamorphic lens takes a wide scene and compresses it into a 4:3 frame. To get it to its proper aspect ratio, it needs to be pulled outward in Photoshop.
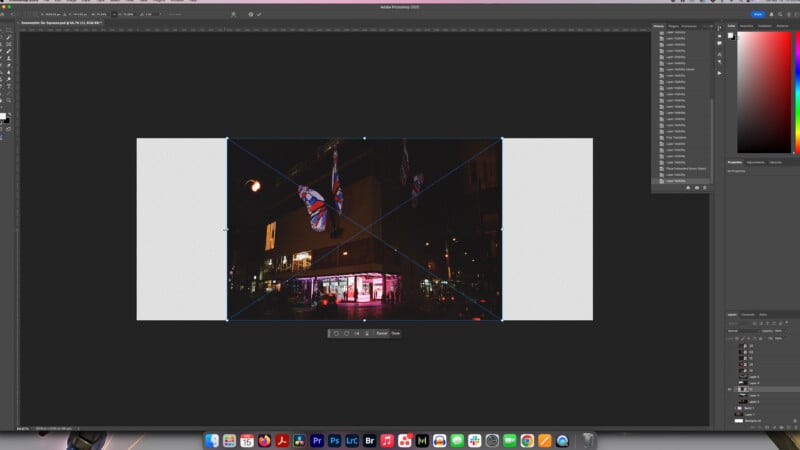
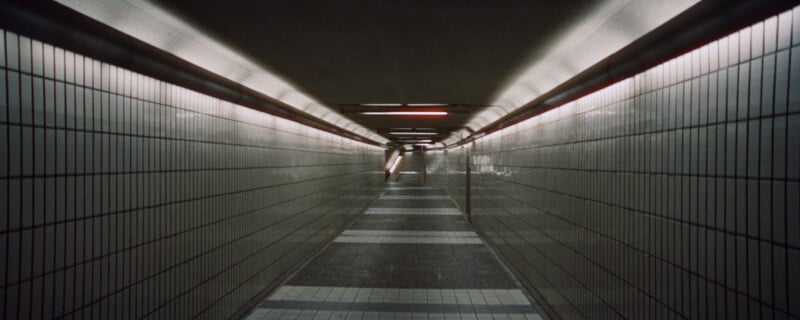
Below is what a photo looks like right off the negative:

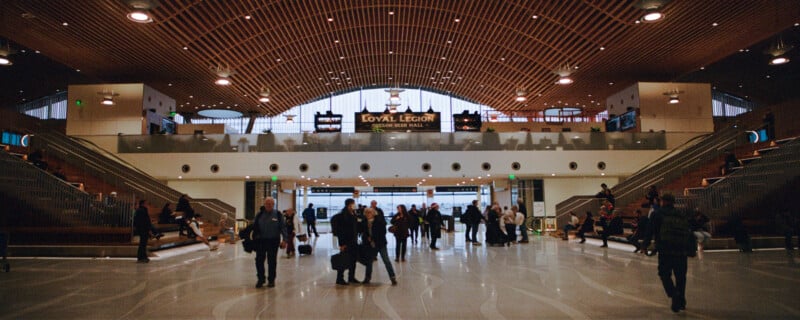
And here it is after it undergoes a 1.5x desqueeze:
To do this, I calculated the size of the canvas in Photoshop that would be the correct final desqueeze and dropped scans into it, dead center. Then I could “pull” the right and left sides to the edge (while holding Shift so as to not constrain proportions), and then I could save the photo from there. That might sound like a lot, but after the arduous process of taking the photos, this was a cakewalk.
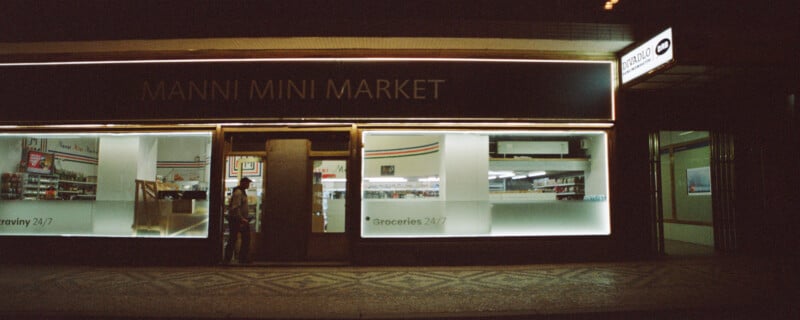
The result is photos that are probably closest to 6×12 panoramic large format but captured in a smaller 35mm frame.
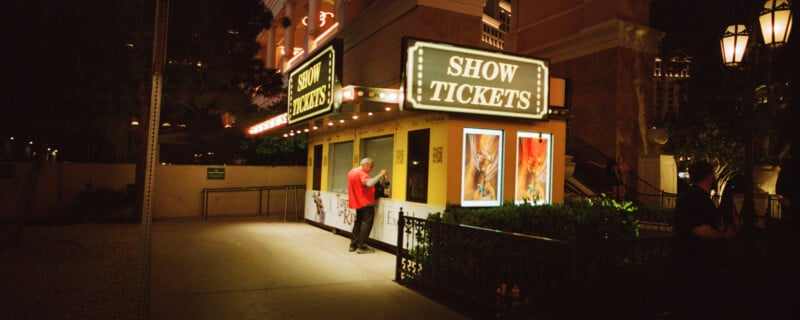
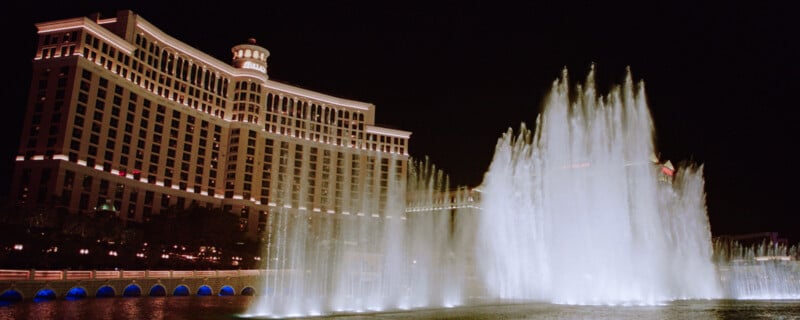
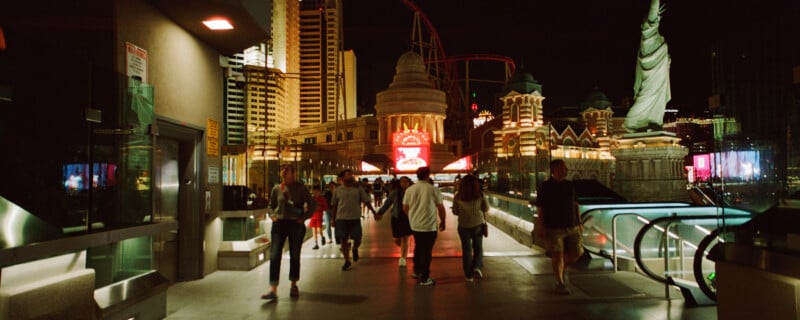
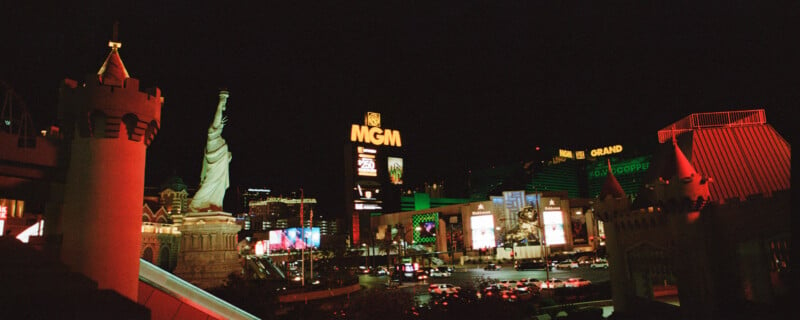
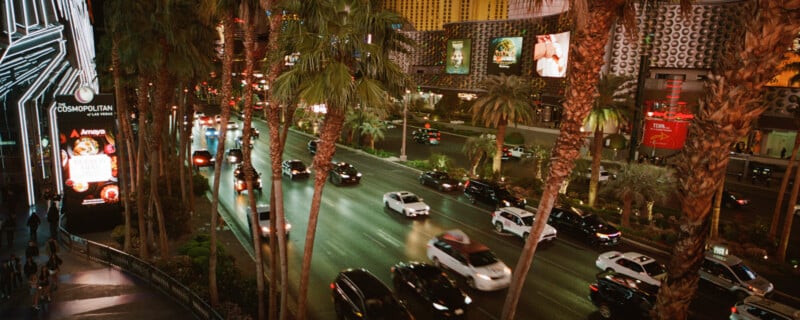
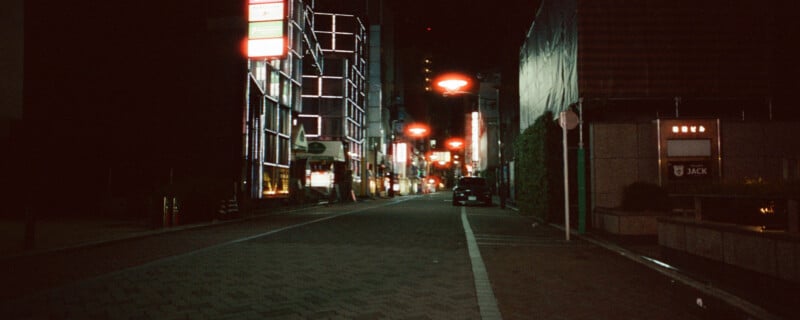
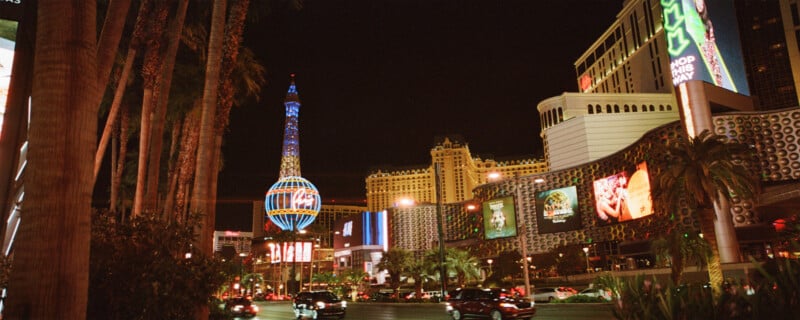
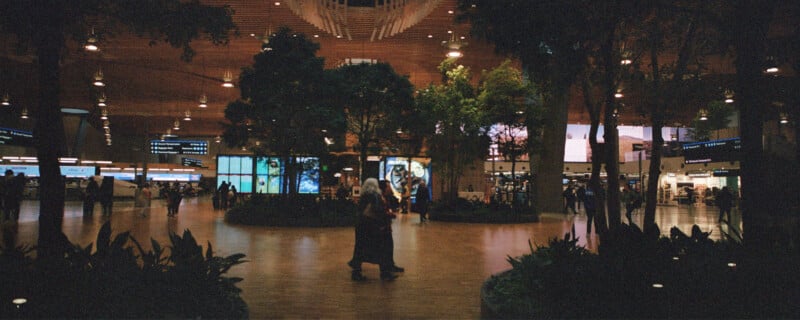
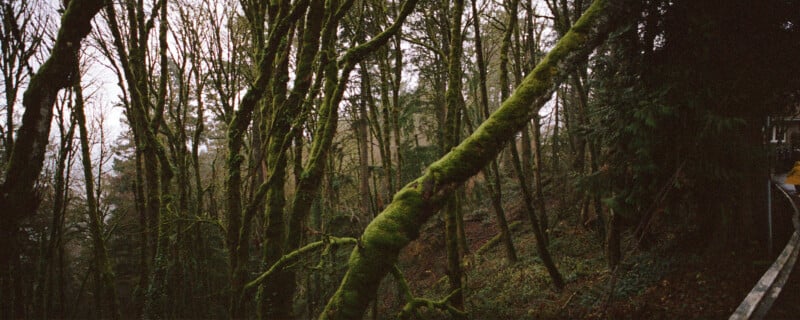
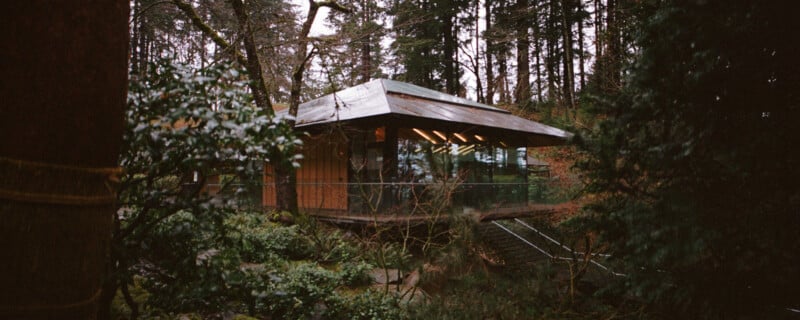
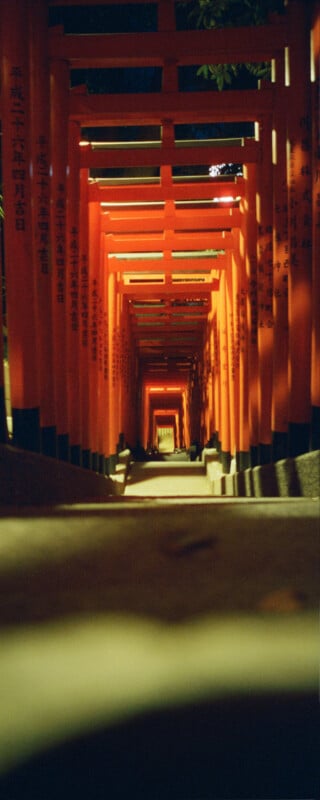
I shot about eight rolls of film using this anamorphic setup, mostly on Kodak Portra 800 (for the ISO range) and Ektar 100. Some of the photos, especially the Ektar, came out really good. I’m particularly happy with the moody Portland Japanese Garden photos, the shots I got in the Portland Airport, and a few of the photos from the streets of Tokyo.


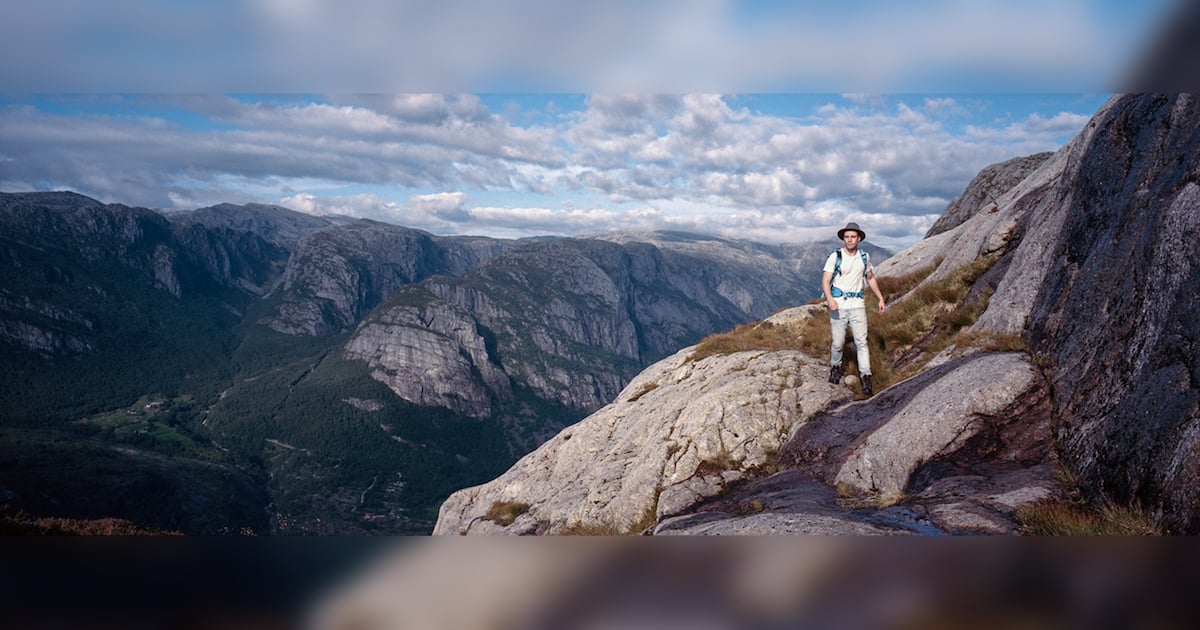
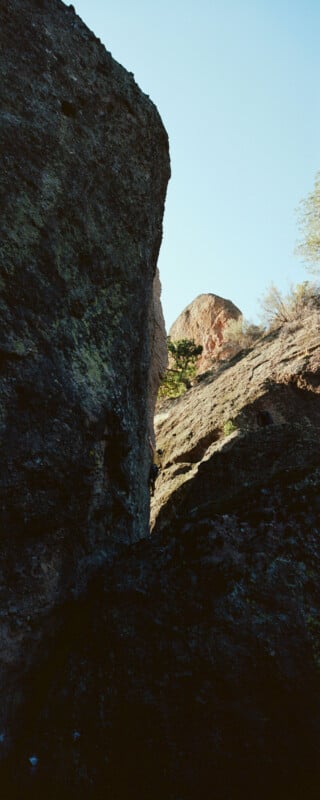
One thing I tried — which I’m still not sure if I like — is shooting in portrait orientation. I mean, it’s photography, so you don’t have to stick to a landscape frame, but these images are long. There is one photo of a rock climber I shot in the Pinnacles National Park that stands out to me as a good use of this aspect ratio, though. They’re in the middle of the frame, outstretched, and the unusually long framing makes it feel even more daunting.
The other couple of verticals I tried just ended up feeling ultra-tall, and while that might be interesting, I’m not sure it’s “good.”

None of these photos are “sharp,” at least not by modern digital standards, but I’m okay with that. I like the vibe and the emotion of these images more than anything. While I can’t say I necessarily enjoyed taking these photos, I’m pretty happy with the results given the difficulty of making them happen.
Anamorphic on 35mm Film: Was It Worth It?
After the last few months of traveling the world and trying out anamorphic on film, I’m left a bit conflicted. On the one hand, there isn’t a better system for using anamorphic on film than the one I’ve got here, which means you have to be willing to sacrifice a lot for this specific look — a look that not everyone will necessarily like. I also learned that I probably shouldn’t have been so focused on the idea of getting that “anamorphic look” by trying to get bright light sources. I got distracted by this and the result is a lot of photos taken in relatively poor light. I think I could do better in more pleasing lighting conditions.
On the other hand, some of the photos I shot really jumped out at me. I’ll probably print and frame at least one. So from that perspective, it was worth it.
I would probably hesitate to recommend this to anyone else though, simply due to how error-prone the process is. I think that if you really like the look of panoramic film photos, there is no getting around it: you have to get a panoramic camera.
Still, I’m glad I tried this. It was a fun experiment that made me think about photography differently and at this point in my career, that’s often the best I can hope for.
Now I’m on the hunt for a Fujifilm TX-1 or Hasselblad XPAN. After that, I look forward to making many, many mistakes as I aspire to just one-tenth the quality David gets in his photos.